How to add a user in FileZilla FTP Server
FTP users require a username and related password to login to an FTP Server from an FTP Client. This tutorial lesson explains how to add a user account in FileZilla FTP Server.
Follow below steps to add a user account in FileZilla FTP Server.
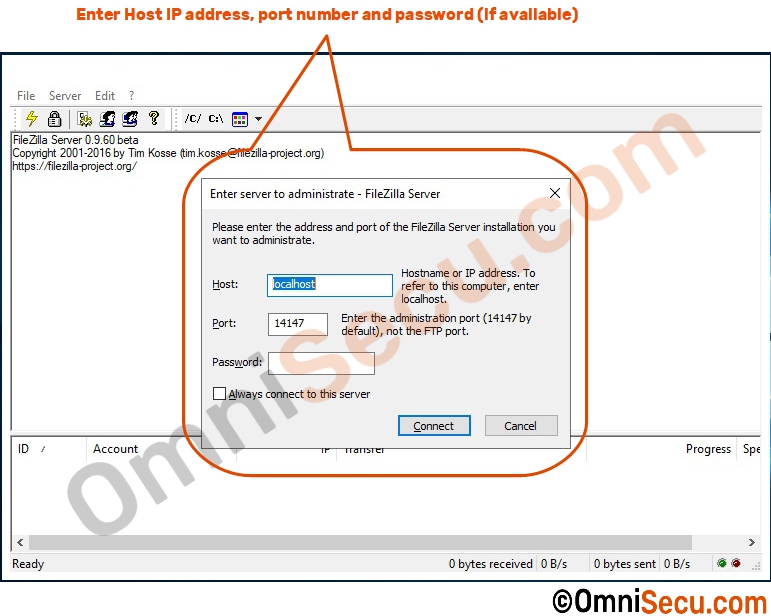
Step 1 - Open FileZilla Server administrator interface. Enter host IP address, port number for administrative interface and password (if available). Click "Connect".
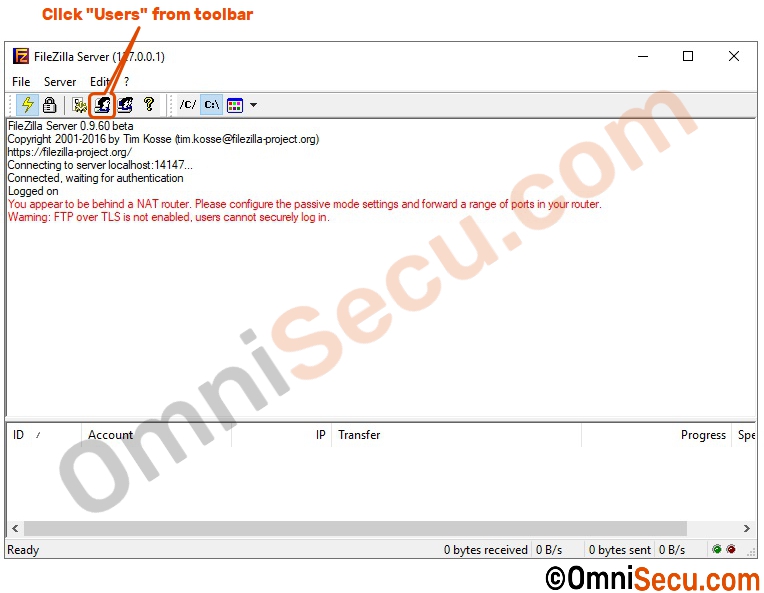
Step 2 - Click "Users" button from tool bar, as shown below.
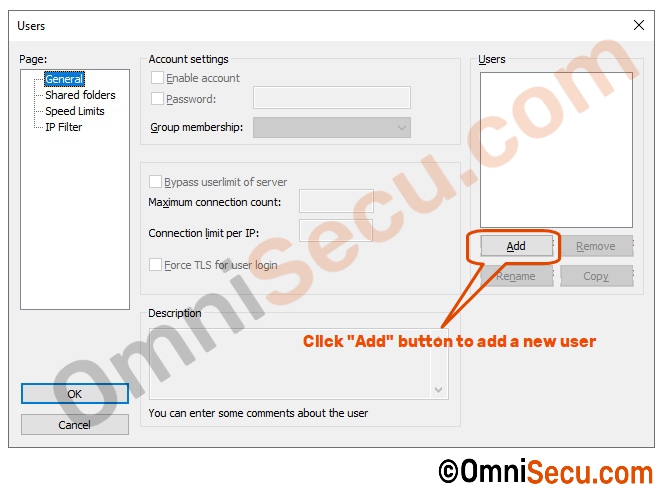
Step 3 - In "Users" window, click "Add" button to add a new user.
Step 4 - Enter the username for the new user account and then click "OK" button.
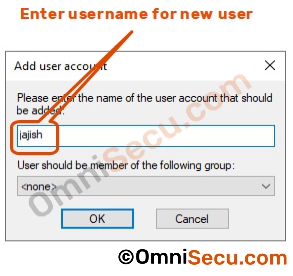
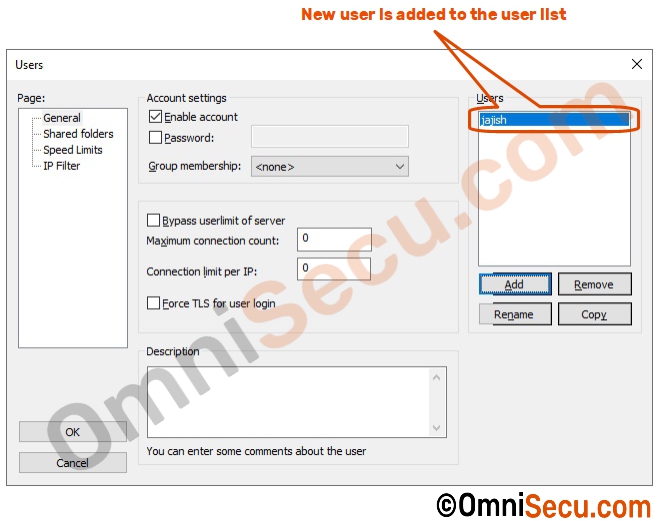
Step 5 - You can see that the new user is added to the user list.
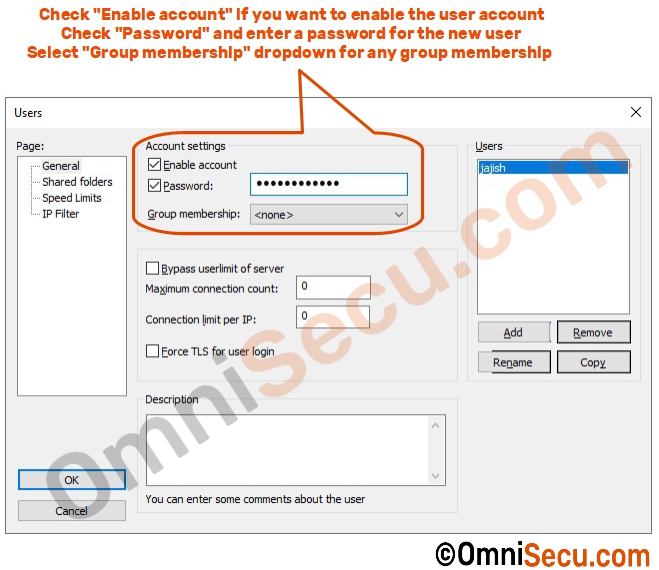
Step 6 - Check "Enable account" if you want to enable the user account. Check "Password" and enter a password for the new user. Select "Group membership" dropdown for any group membership.
Step 7 - Select the new user added from the user list and then click "Shared folders" as shown below.
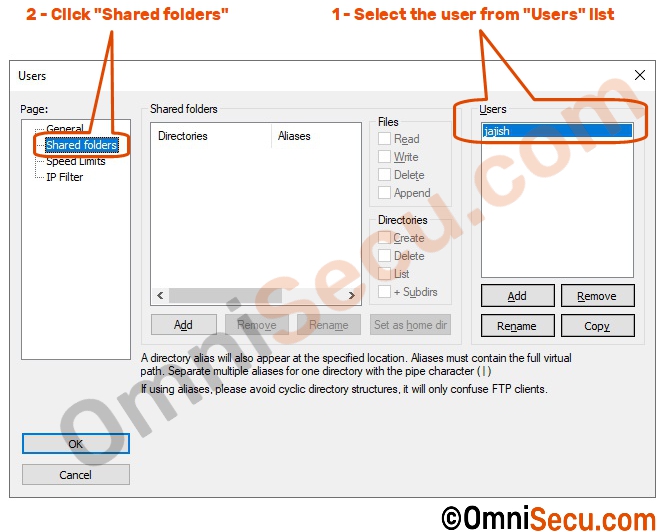
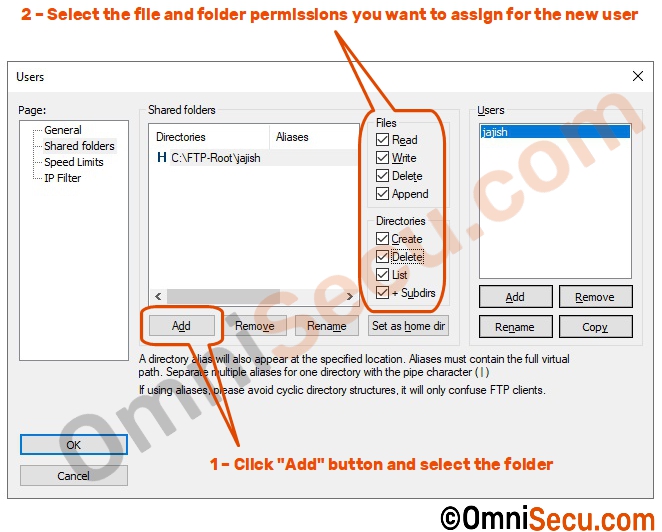
Step 8 - Click "Add" button to browse and add a shared folder. Select file and folder permissions you want to assign to the new user. Take extreme care while assigning file and folder permissions. Always assign the least permissions required for the user.
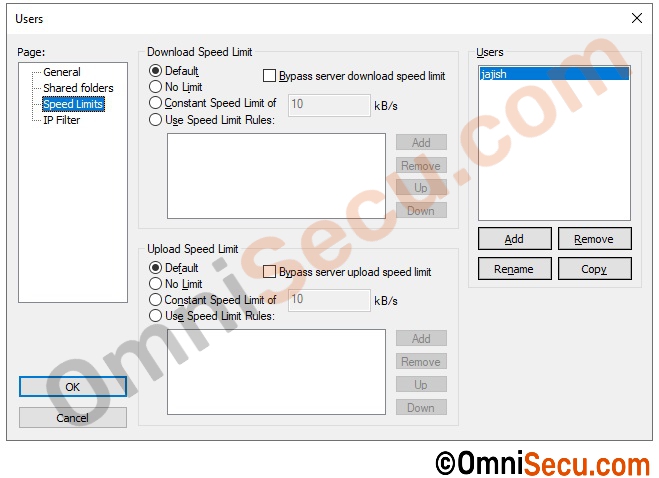
Step 9 - In "Speed limits" page, you may assign any download and/or upload speed limit for the new user.
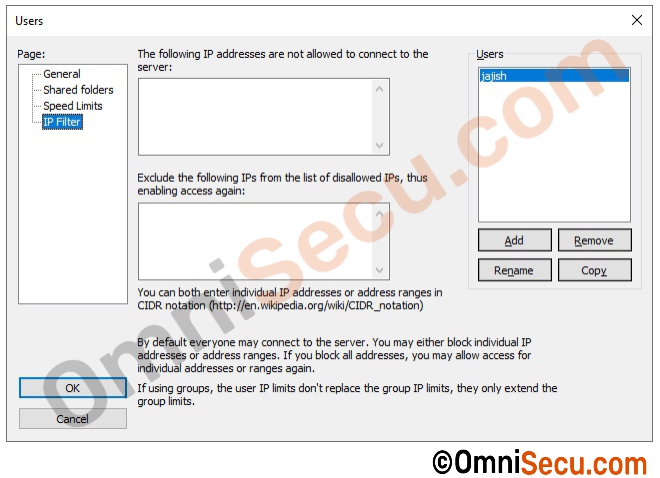
Step 10 - In "IP Filter" page, you may assign any IP Filter required for the new user. Once completed, click "OK " button to save and exit.
