How to configure TLS (FTPS) in FileZilla FTP Server
We had already learned in a previous lesson that plain FTP is not secure. In case, if you had missed that lesson, click the following link to learn why plain-text FTP is not secure. In this lesson, we will learn how to secure FTP by adding TLS protection (FTPS) in FileZilla FTP Server and how to use FileZilla FTP Client with TLS protection (FTPS).
Follow below steps to configure TLS (FTPS) in FileZilla FTP Server and to use FileZilla FTP Client with TLS protection (FTPS)
Step 1 - Open FileZilla Server administrator interface. Enter host IP address, port number for administrative interface and password (if available). Click "Connect".
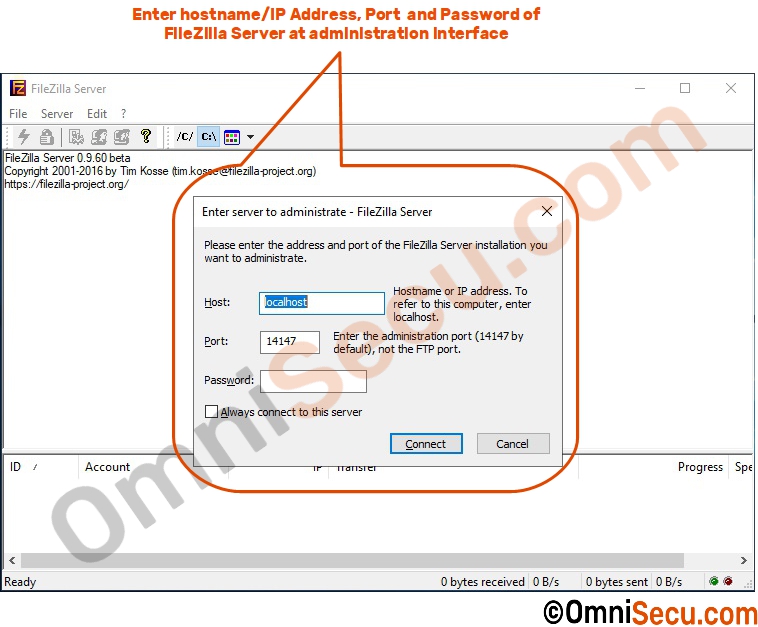
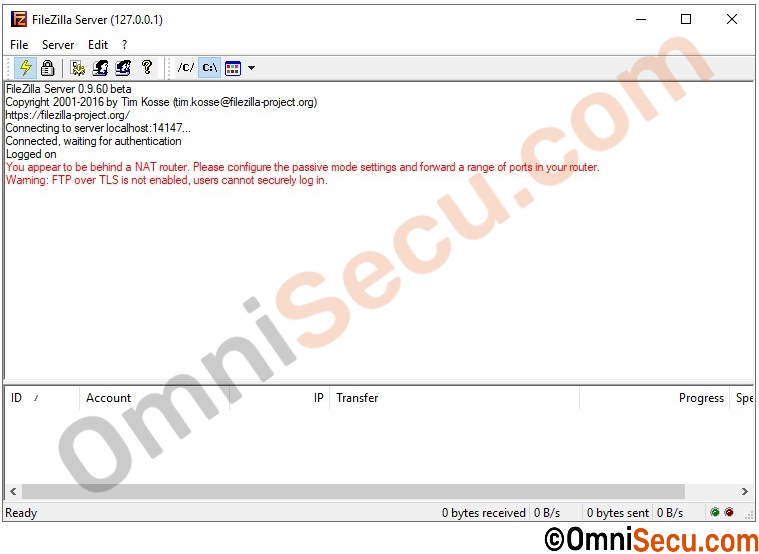
Step 2 - FileZilla FTP Server administrative interface is now connected to the Server.
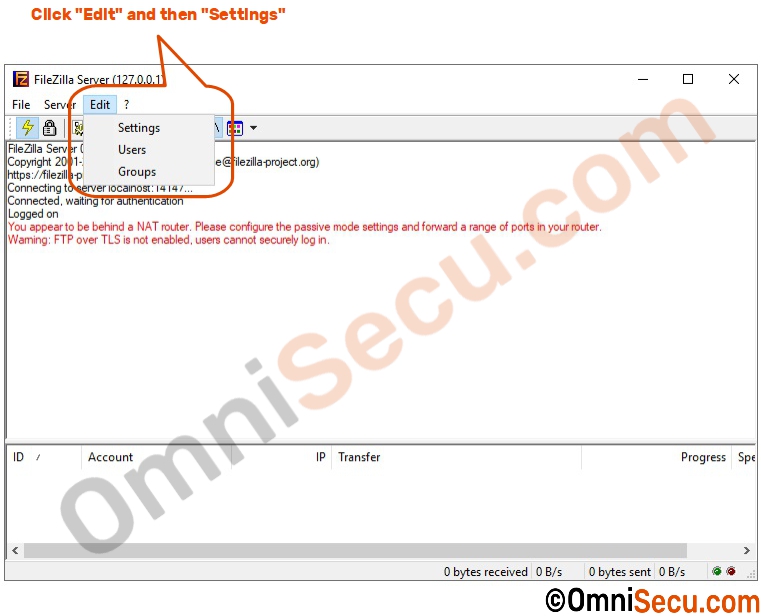
Step 3 - Click "Edit" menu, and then "Settings" as shown below.
Step 4 - You need a digital certificate to configure TLS in FileZilla FTP Server. If you are using this FTP Server in the internet, it is always better to purchase a trusted CA (Certificate Authority) signed digital certificate and configure TLS in FileZilla FTP Server. You may also generate a self-signed certificate and use that certificate to configure TLS in FileZilla FTP Server for internal use. In this example, we are going to generate a self-signed certificate and going to use that certificate to configure TLS (FTPS) in FileZilla FTP Server.
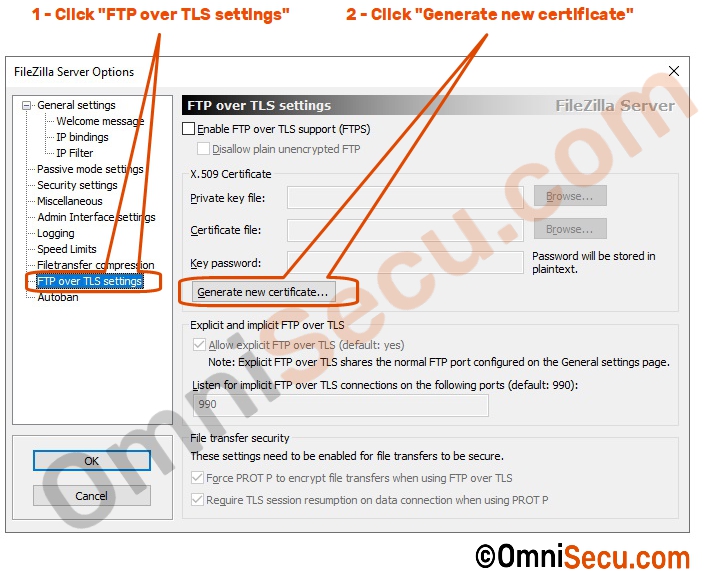
Select "FTP over TLS settings" and the click "Generate new certificate" to generate a self-signed digital certificate.
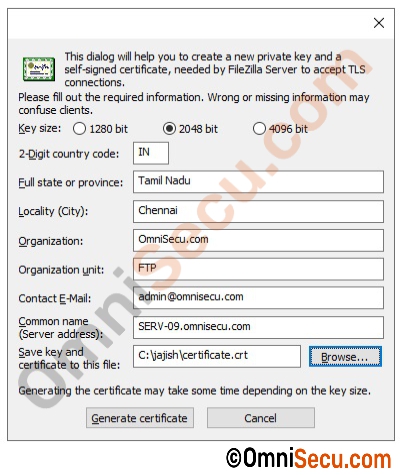
Step 5 - Fill in your details in the form window, similar to below image. Note that higher key size provide much more security, with lesser performance.
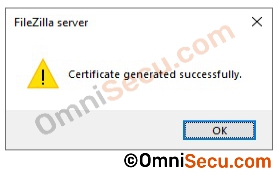
Step 6 - If the digital certificate is generated successfully, you will get a message similar to below image.
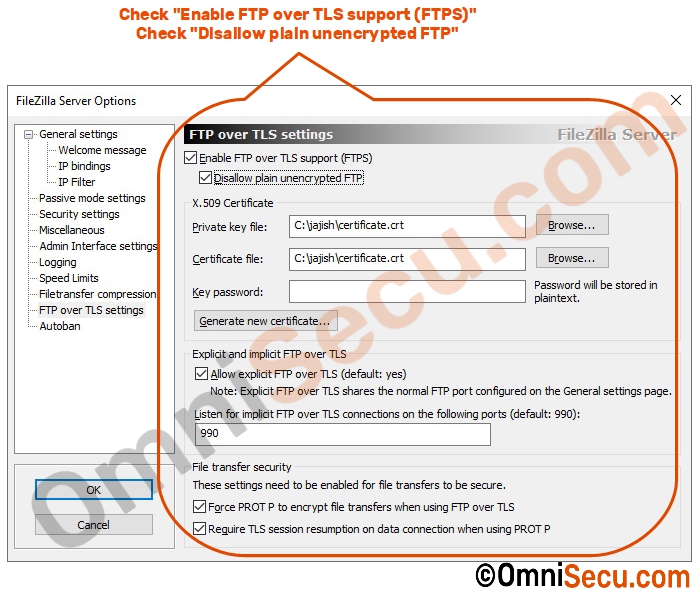
Step 7 - "FTP over TLS settings" form fields will be filled automatically with the details of the newly generated self-signed digital signature. Check the checkbox "Enable FTP over TLS support (FTPS). If you want to disable plain-text FTP, check "Disallow plain unencrypted FTP" checkbox. Leave other settings as default. Click the following link, if you want to learn the difference between explicit FTP over TLS and implicit FTP over TLS.
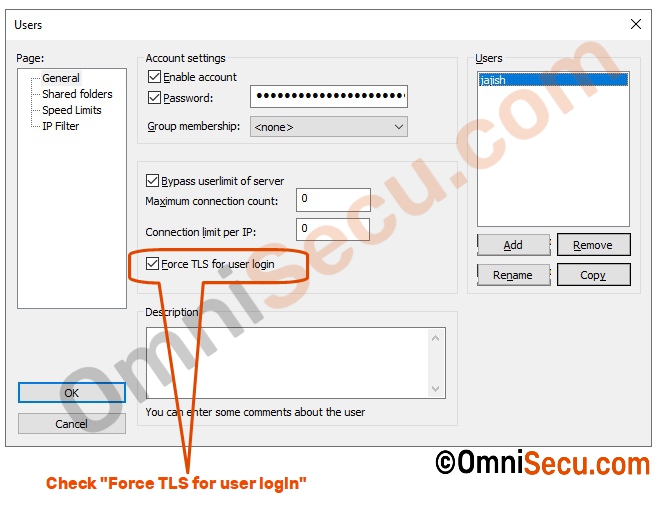
Step 8 - Now got to "Users" and select the user from the user list. Check "Force TLS for user login" checkbox.
With this step, the settings at the FileZilla Server for configuring TLS is over. Now, let us move to the FTP Client computer and start configuring FileZilla FTP Client for FTP over TLS (FTPS).
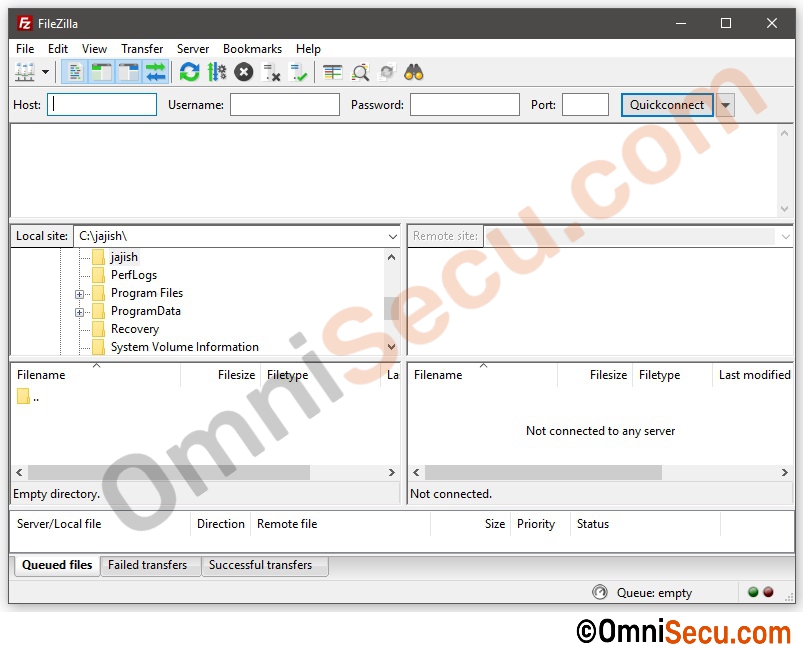
Step 9 - Open FileZilla FTP Client.
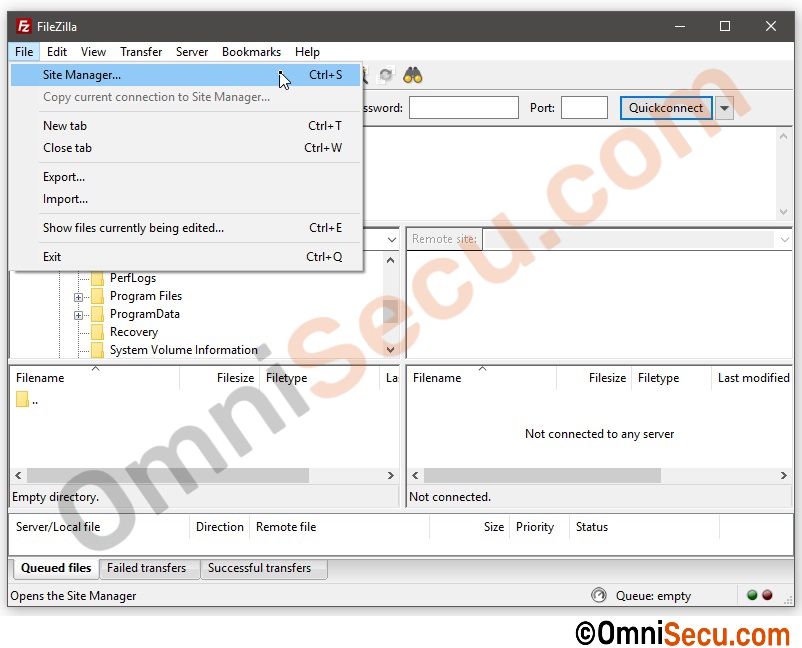
Step 10 - Click "File" menu and the "Site Manager", as shown below.
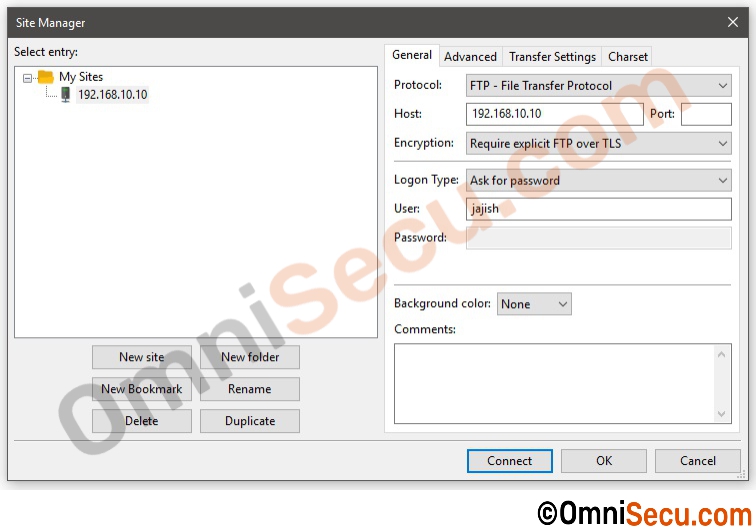
Step 11 - Select "Require explicit FTP over TLS" or "Require implicit FTP over TLS" as shown in below image. Click the following link, if you want to learn the difference between explicit FTP over TLS and implicit FTP over TLS.
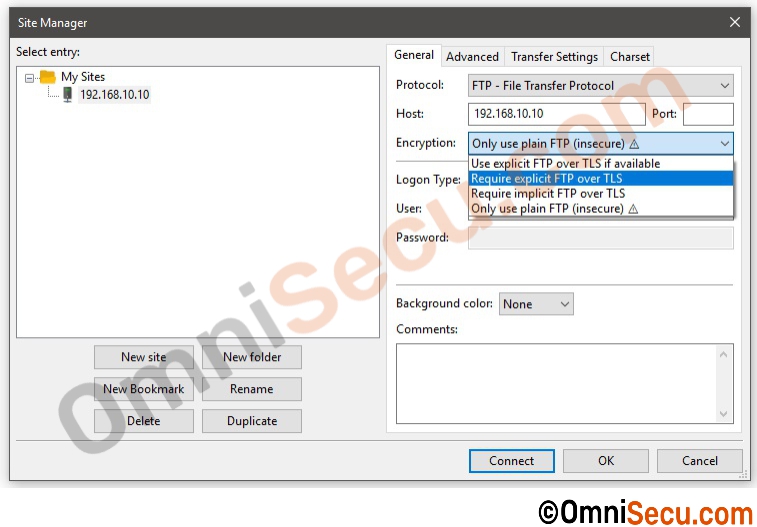
Step 12 - I had selected "Require explicit FTP over TLS" for this demo example, as shown below. Enter the host IP address and the username. Click "Connect" button.
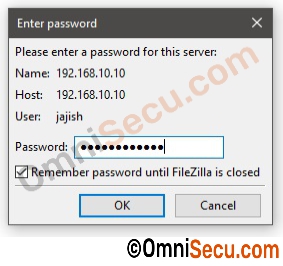
Step 13 - Enter the password of the user entered in previous step. Click "OK" button.
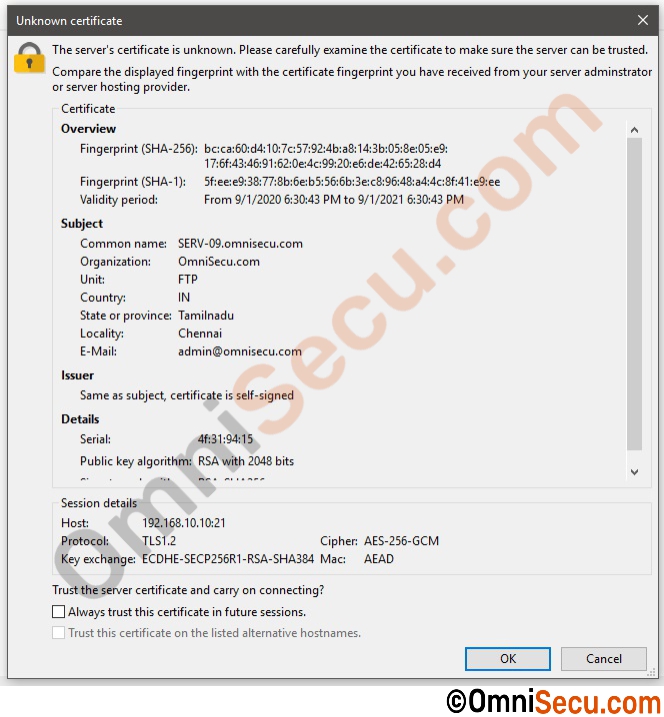
Step 14 - Digital certificate details will be shown as in below image. The warning "The server’s certificate is unknown" is because it is a self-signed certificate. It is okay for internal use. Check thoroughly the details in server digital certificate are correct or not. If you are convinced about the genuineness of the digital certificate, click "OK" button to connect FTP Server using TLS (FTPS).
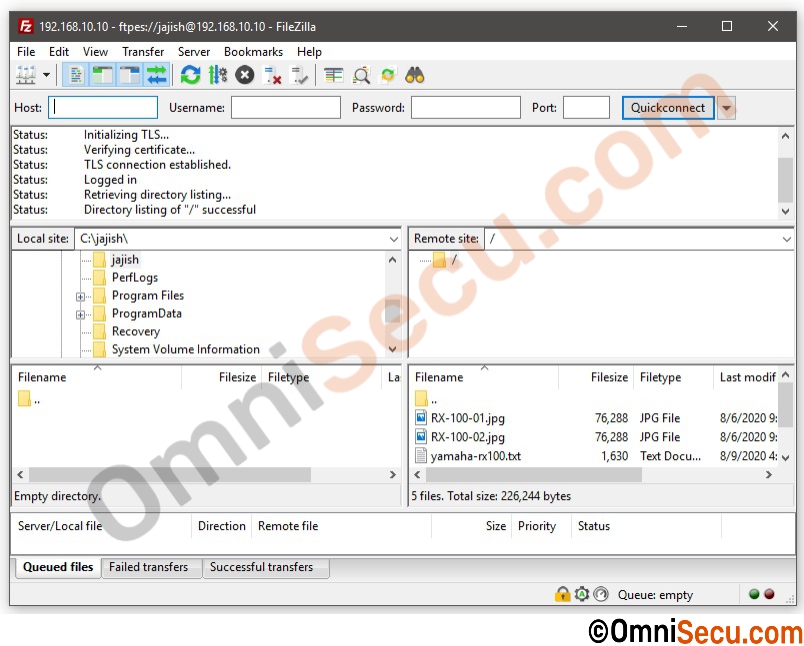
Step 15 - Now you are connected to the FTP Server using FTP over TLS (FTPS).
